Appearance
VTK.wasm in Python with trame
While VTK is a C++ library, it is available in Python on PyPI and Conda which make it simple to install and use it within any Python environment.
For making a web UI in plain Python with VTK, there is nothing better than trame for getting the best of your data processing and visualization.
VTK.wasm is naturally integrated into trame as a widget to perform the 3D rendering using the browser capability.
For those not familiar with trame, trame allow to define an interactive application in plain Python using a web user interface. Trame abstract the client/server architecture by making the binding of events or state with the graphical interface transparent in a way that it feels like everything is local. Also when defining the graphical interface, the user use widgets to compose the content of the display.
Getting started
With trame or any Python project it is best to start with an isolated virtual environment. In the code below we will be using uv as a unified way of setting such environment across platforms.
sh
# you can choose any Python version where VTK is supported
# So far [3.8 to 3.13]
uv venv -p 3.10
source .venv/bin/activate

# install dependencies
uv pip install "vtk==9.5.20250531.dev0" --extra-index-url https://wheels.vtk.org # get latest vtk with all the wasm capabilities
uv pip install "trame>3.9"    # Install recent trame
uv pip install trame-vuetify  # - add some nice GUI widget for trame
uv pip install "trame-vtklocal>=0.12.3" # - add VTK.wasm widget for trame
sh
# you can choose any Python version where VTK is supported
# So far [3.8 to 3.13]
uv venv -p 3.10
.venv\Scripts\activate
# install dependencies
uv pip install "vtk==9.5.20250531.dev0" --extra-index-url https://wheels.vtk.org # get latest vtk with all the wasm capabilities
uv pip install "trame>3.9" # Install recent trame
uv pip install trame-vuetify # - add some nice GUI widget for trame
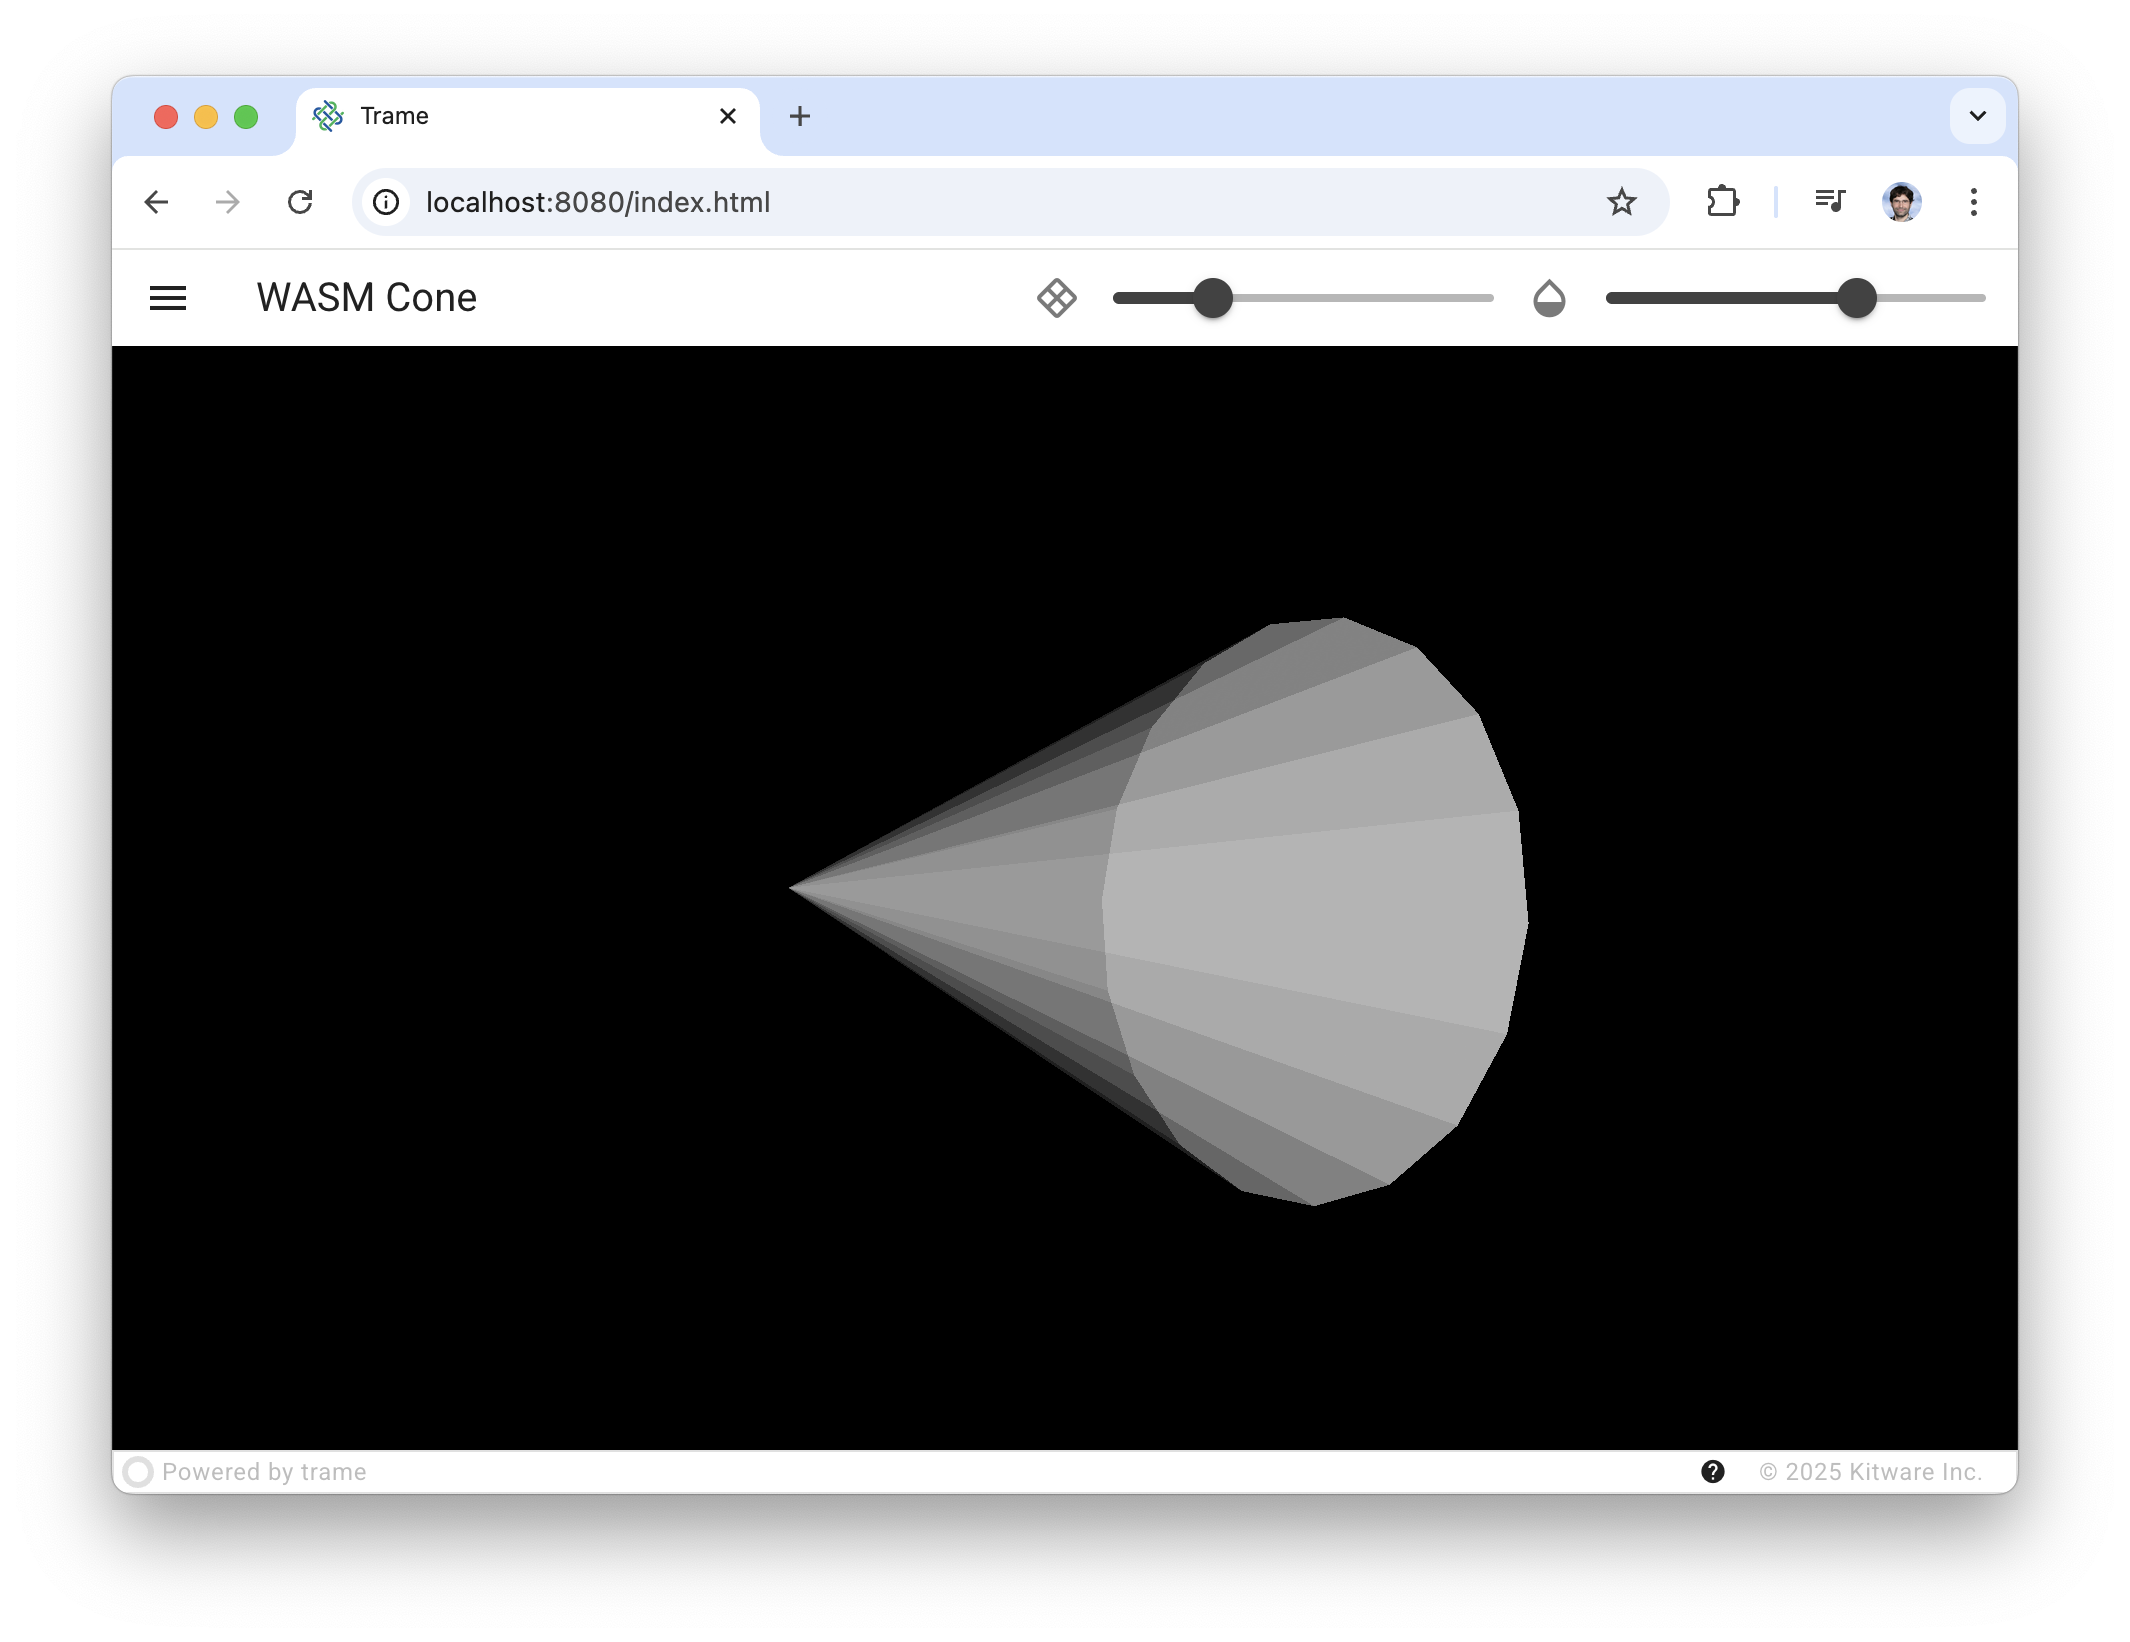
uv pip install "trame-vtklocal>=0.12.3" # - add VTK.wasm widget for trameOnce your working environment is ready you can try the following code example that just setup a cone and let you edit its resolution and opacity.
py
with vtklocal.LocalView(
    self.render_window,
    throttle_rate=20,
) as view:
    self.ctrl.view_update = view.update_throttle
self.ctrl.view_reset_camera = view.reset_camerapy
renderer = vtk.vtkRenderer()
renderWindow = vtk.vtkRenderWindow()
renderWindow.AddRenderer(renderer)
renderWindow.OffScreenRenderingOn()

renderWindowInteractor = vtk.vtkRenderWindowInteractor()
renderWindowInteractor.SetRenderWindow(renderWindow)
renderWindowInteractor.GetInteractorStyle().SetCurrentStyleToTrackballCamera()

cone_source = vtk.vtkConeSource()
mapper = vtk.vtkPolyDataMapper()
actor = vtk.vtkActor()
mapper.SetInputConnection(cone_source.GetOutputPort())
actor.SetMapper(mapper)
renderer.AddActor(actor)
renderer.ResetCamera()
renderWindow.Render()py
# Should import classes from vtkmodules
# but as an example we use vtk for simplicity
import vtk

from trame.app import TrameApp
from trame.decorators import change
from trame.ui.vuetify3 import SinglePageLayout
from trame.widgets import vuetify3, vtklocal


class Cone(TrameApp):
    def __init__(self, server=None):
        super().__init__(server)
        self._setup_vtk()
        self._build_ui()

    def _setup_vtk(self):
        # region vtk
        renderer = vtk.vtkRenderer()
        renderWindow = vtk.vtkRenderWindow()
        renderWindow.AddRenderer(renderer)
        renderWindow.OffScreenRenderingOn()

        renderWindowInteractor = vtk.vtkRenderWindowInteractor()
        renderWindowInteractor.SetRenderWindow(renderWindow)
        renderWindowInteractor.GetInteractorStyle().SetCurrentStyleToTrackballCamera()

        cone_source = vtk.vtkConeSource()
        mapper = vtk.vtkPolyDataMapper()
        actor = vtk.vtkActor()
        mapper.SetInputConnection(cone_source.GetOutputPort())
        actor.SetMapper(mapper)
        renderer.AddActor(actor)
        renderer.ResetCamera()
        renderWindow.Render()
        # endregion vtk

        self.render_window = renderWindow
        self.cone = cone_source
        self.actor = actor

    def _build_ui(self):
        with SinglePageLayout(self.server) as layout:
            self.ui = layout

            layout.title.set_text("WASM Cone")
            layout.icon.click = self.ctrl.view_reset_camera

            with layout.toolbar as toolbar:
                toolbar.density = "compact"
                vuetify3.VSpacer()
                vuetify3.VSlider(
                    prepend_icon="mdi-rhombus-split-outline",
                    v_model=("resolution", 6),
                    min=3,
                    max=60,
                    step=1,
                    density="compact",
                    hide_details=True,
                )
                vuetify3.VSlider(
                    prepend_icon="mdi-opacity",
                    v_model=("opacity", 1),
                    min=0,
                    max=1,
                    step=0.01,
                    density="compact",
                    hide_details=True,
                    classes="mr-4",
                )

            with layout.content:
                # region widget
                with vtklocal.LocalView(
                    self.render_window,
                    throttle_rate=20,
                ) as view:
                    self.ctrl.view_update = view.update_throttle
                    self.ctrl.view_reset_camera = view.reset_camera
                # endregion widget

    @change("resolution")
    def on_resolution(self, resolution, **_):
        self.cone.resolution = resolution
        self.ctrl.view_update()

    @change("opacity")
    def on_opacity(self, opacity, **_):
        self.actor.property.opacity = opacity
        self.ctrl.view_update()


def main():
    app = Cone()
    app.server.start()


if __name__ == "__main__":
main()txt
--extra-index-url https://wheels.vtk.org

trame>=3.9
trame-vuetify
trame-vtklocal>=0.12.3

vtk==9.5.20250531.dev0
The key take away is that the vtkRenderWindow instance needs to be pass to the vtklocal.LocalView widget. The widget itself provide a set of helper methods but the most relevant ones are:
update(push_camera=False): synchronize the current state of the vtkRenderWindow to the client right away.update_throttle(push_camera=False): synchronize the current state of the vtkRenderWindow to the client but no more than the provided rate (view.update_throttle.rate = 15or in widget constructorthrottle_rate=20)reset_camera(renderer_or_render_window=None): reset the camera by asking the client (JavaScript) to do it.
The full working code is also available.